In my last post, I completed the first subassembly, cut the glass-retention slats to size and beaded the half-slats. Before affixing them to the shelf, it was time to put some finish on everything.
On my first prototype, I used wine to stain the exposed end grain of one of the slats. It really didn’t appeal to me, but more importantly, it didn’t appeal to my client (my lady).
For the final stain, I created a five-sample splotch so that she could decide among the options.
And the winner is…
After one coat of stain, the aspen looked a bit reddish in the light of my garage workshop. When I took it inside by the buffet, it picked up the amber hues of the buffet and the room’s wood trim. Alongside those elements, it looks amberish, which was exactly what I wanted. An added benefit is that the lighter stain brings out the grain nicely.
After the stain dried, each piece received a hand-rubbed coating of satin polyurethane. A 400 grit, very light, sanding between coats left a smooth finish.
After three coats, I signed and dated the back with a green permanent marker. Then encased it in a coat of polyurethane finish.
Final Assembly
I installed the half slats first, flush against each of the shelf support brackets.
After that, I evenly spaced the two full slats in between the outer half slats.
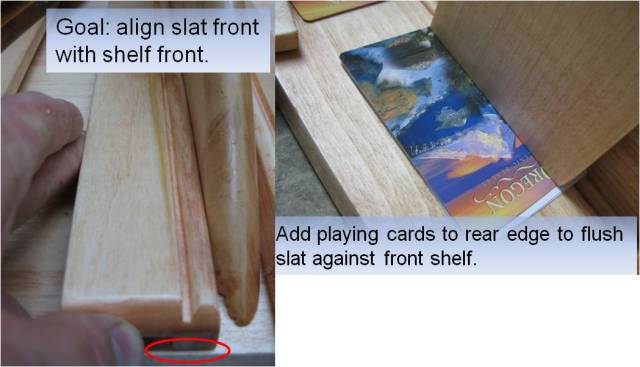
When I sized each slat, I made them about 1/16” short along the width of the shelf to allow for wood movement. I used playing cards as spacers to bring the front edge of each slat flush with the front edge of the shelf. Some required three cards, others four.
Once I had them flush, I clamped them to the shelf, measured in 2.5 inches and drilled a hole center mass.
From the initial hole, I dropped a plumb, measuring up from the bottom about 2.5” and drilling a second hole.
Drilling the hole left some tearout to make the slat sit proud of the shelf, so I unclamped the slat and used a chisel to remove the waste for a flush fit.
In order for the top shelf to be one continuous, non-catching surface, it was necessary to countersink the mounting screws so they sit flush. My restored 6” Skinner brace was perfect to countersink the holes from the top so that the screws would not show once the rack was mounted.
Once this was complete, the completed rack dried in my shop for a week while I traveled to Toronto and St. Louis on business.
In my next post, I’ll mount the rack and load it up with pretty glassware.
###


That’s a nice trick with the plumb bob. My father always told me that they never go out of level.
Yes, the margin of error was very small on the half-slats. Being off by a little could have split the portion that seats against the shelf. The plumb bob approach was far better at locating the holes to avoid this than was the use of a ruler. And yes, my plumb bob is still in level. Keep your fingers crossed!